
TECHNICAL INSTRUCTIONS
SAFETY RECALL 21TA08
SECOND-ROW OUTBOARD SEAT BELT COULD TEAR IN A CRASH
CERTAIN 2022 MODEL YEAR SIENNA VEHICLES
CONVERTED FOR WHEELCHAIR ACCESSIBILITY BY
VANTAGE MOBILITY INTERNATIONAL (VMI)
SAFETY RECALL 21TA08 Second-Row Outboard Seat Belt Could Tear in a Crash – 2022 Toyota Sienna
Remedy Instructions and TSB
RCRIT-21V889-1485.pdf 1807.013KB
Latest Recalls Documents
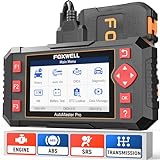
- [Easy to Use—Work Out of the Box] + [FOXWELL 2026 New Version] FOXWELL NT604 Elite scan tool is the 2026 new version from FOXWELL, designed for car owners who want to figure out the cause of issues before fixing car problems by scanning common systems like ABS, SRS, engine, and transmission. The NT604 Elite obd2 scanner diagnostic tool comes with the latest software—no need to waste time downloading software first. Plug the scanner into the OBDII port with OBDII cable to start the diagnosis.
- [Affordable] + [Reliable Car Health Monitor] Will you be confused what happens when the warning light of ABS/SRS/transmission/check engine flashes? Instead of taking your cars to dealership, this FOXWELL scanner will help you do a thorough scanning and detection for your cars and pinpoint the root cause. Note:The device is a diagnostic tool, not a repair tool. To turn off a warning light, you must first physically repair the issue causing it. Only then can the scanner be used to clear the corresponding fault code.
- [5 in 1 Car Diagnostic Scanner] Compared with obd scanners (50-100), NT604 Elite code scanner not only includes their OBDII diagnosis but also serves as ABS/SRS scanner, transmission and check engine code reader. When it’s an odb2 scanner, you can use it to check if your car is ready for annual test through I/M readiness menu. In addition, live data stream, built-in DTC library, data play back and print, all these features are a big plus for it. Note: doesn't support maintenance functions like reset or relearn. For the SRS system, NT604 Elite can read and clear common fault codes not caused by a crash, but crash/collision data cannot be cleared.
- [Fantastic AUTOVIN] + [No extra software fee] Through the AUTOVIN menu, this NT604 Elite car scanner allows you to get your V-IN and vehicle info rapidly, no need to take time to find your V-IN and input one by one. What's more, the NT604 Elite ABS SRS scanner supports 60+ car brands from worldwide (America/Asia/Europe). You don’t need to pay extra software fee. AUTOVIN may not work on some older vehicles or certain vehicle brands. If AUTOVIN fails, please input the vin code manually or go to the Diagnostic Menu to select your vehicle model.
- [Solid protective case KO plastic carrying bag] + [Lifetime update] Almost all same price-level car scanner diagnostic tool only offers plastic bag to hold the scanner.However, NT604 Elite automotive scanner is equipped with solid protective case, preventing your obd2 scanner from damage. Then you don’t need to pay extra money to buy a solid toolbox.
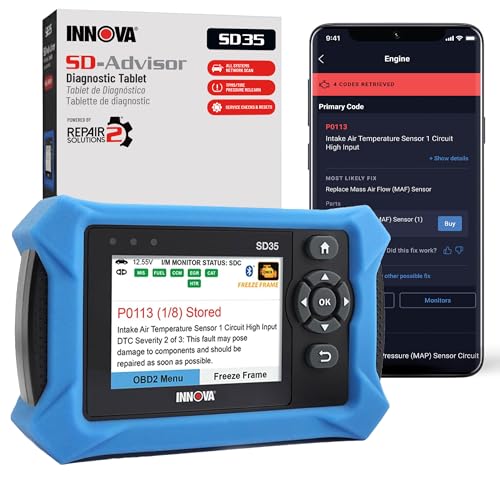
- OBD2 SCANNER FOR ALL SYSTEMS – The INNOVA SD35 is a tablet-based OBD2 scanner designed for advanced diagnostics. Read and clear check engine light, ABS, SRS, and TPMS codes, plus test your car battery and alternator to prevent unexpected failures. Vehicle coverage may vary. Please use Innova’s Coverage Checker to verify compatibility.
- ALL-SYSTEM DIAGNOSTICS & LIVE DATA – Unlike basic code readers, this OBD2 scanner for all vehicles scans engine, transmission, ABS, SRS, and more. Get real-time live data, including RPM, fuel trims, temperature readings, and oxygen sensor performance.
- OBD2 TABLET WITH USER-FRIENDLY INTERFACE – This automotive scan tool features a high-resolution display, making vehicle diagnostics faster and easier.
- ADVANCED TPMS, OIL RESET & SERVICE FUNCTIONS – Perform TPMS sensor checks, oil light reset, and other service resets with ease This professional diagnostic tool provides comprehensive vehicle maintenance capabilities in one device.
- WIDE VEHICLE COVERAGE (1996 & NEWER CARS & TRUCKS) – This OBD2 scanner Bluetooth tablet is compatible with Toyota, Ford, Honda, Chevrolet, Nissan, Dodge, and more. However, feature coverage may vary. Please use Innova's Coverage Checker to verify coverage.
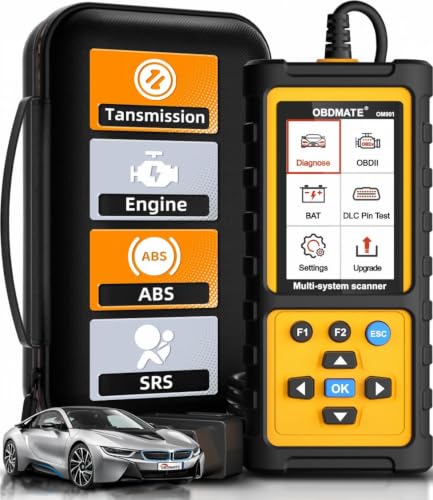
- 【Reset ABS/SRS/Transmission/Engine Lights】 More than an check engine code reader, OBDMATE OM901 obd2 scanner performs comprehensive diagnostics for the 4 most-used systems (ABS/SRS/Engine/Transmission). It quickly clears fault codes, turns off warning lights, read data stream and auto VIN.
- 【3.5" Handheld Scanner with 4 System Diagnose】 3.5" Super large TFT screen equipped displays an intuitive menu and clear readings of various sensors from ABS, SRS, ECM and TCM systems. It arrived with a silicone protective case and hard-shell carrying case, ensuring long-lived durability and drop resistance. The car diagnostic tool is plug-to-play designed, plug it and get diagnosis started without any batteries or updates required.
- 【One-Click I/M Readines&Full OBD2 Functions】 Press F1 to get an intuitive corloured form about whether various emissions-related systems on the vehicle are operating properly. Help you get smog-check ready quickly. OM901 car scanner supports all essential OBD2 functions you need: read & clear codes, view freeze frame, read I/M readiness, retrieve VIN, live data stream (with graphing display), O2 sensor test, onboard monitoring mode, and EVAP leak test.
- 【Battery Voltage Check&DLC Pin Test】 It allows you to monitor battery health by testing current battery voltage. Plus, this obd2 diagnostic tool features DLC 16-PIN test to check current voltage of every pin.
- 【Automotive Scanner Diagnostic Kit】 The package comes with 1 car scanner, 1 USB-type c cable, 1 hard storage bag and 1 user manual(en). Free to update without any hidden fees. 5 languanges available in setting including English, French, Italian, German and Espanish. Valuable and Portable, making it a great tool kit for car owners, DIY enthusiasts, and professional mechanics.
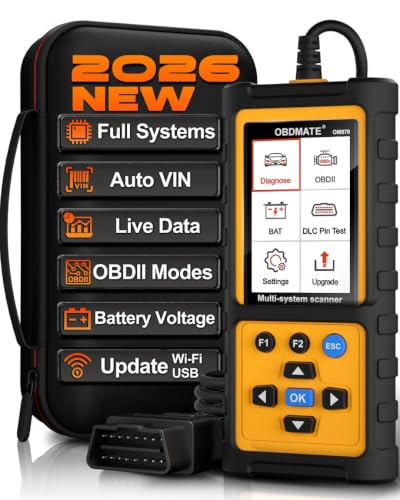
- 【Full Systems Automotive Diagnostic】 More than checking engine, ABS and SRS, OBDMATE OM970 obd2 scanner performs comprehensive diagnostics on all electric modules. It quickly scans and clears fault codes, turns off warning lights, reads live data, and features Auto-VIN technology.
- 【Live Datastream&4-in-1 Graph】 Easily view live sensor data such as RPM, fuel trims, ATF temperature, wheel speed sensor, battery voltage and so on. OM970 scan tool also supports 4-in-1 trend graphing. Spend just 3 minutes to check – and you'll know exactly what's going wrong, helping you avoid hundreds in dealership diagnostic fees.
- 【One-Click I/M Readiness&Full OBD2 Functions】 Press F1 to get an intuitive corloured form about whether your vehicle's emissions-related systems are operating properly. Help you get smog-check ready quickly. OM970 obd2 diagnostic tool supports all essential OBD2 functions you need. Plus, it features battery voltage test and DLC 16-PIN test.
- 【Straightforward Menus with Easy Navigation】 All functions are easy to understand without obscure decriptions. 3.5" Large screen delivers clear readings while keeping one-hand operation. The car diagnostic tool comes with a silicone protective case and a hard-shell carrying case, ensuring long-lived durability and drop resistance.
- 【Budget-Friendly, No Subscriptions, Free Software Updates】 Plug and play: no bluetooth pairing, monthly fees, Wi-Fi connection, or any other troublesome initial settings. OM970 obd2 scanner works out of the box with the latest software. Lifetime free upgrade.
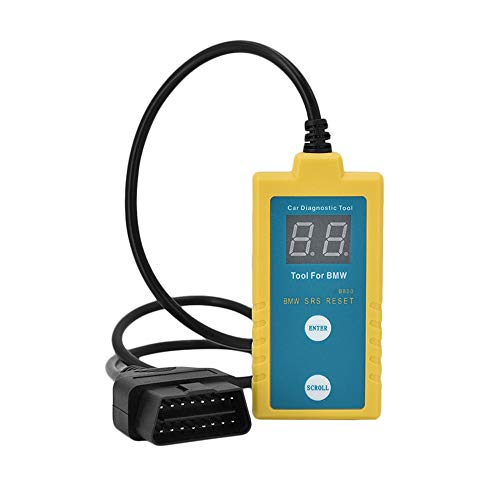
- ✔️【Professional SRS Reset for 1994-2003 BMW】 Designed specifically for classic BMW models (1994-2003). This B800 scanner reads & clears SRS airbag fault codes, turns off the warning light, and saves you a costly dealer visit. Confirmed compatible with: E36, E46 (EXCEPT 2001 330i), E34, E38, E39, Z3, and X5 (E53). NOT compatible with any BMW built before 1994 or after 2003.
- ✔️【Important: Two Different Connection Ports – Read Before Use】 To avoid “not working” issues, please note: For 1994–2000 BMWs (most E36, E34, Z3, early E39), the SRS diagnostic port is a round 20-pin connector under the hood. You MUST use the included 16-pin to 20-pin adapter cable. For 2000–2003 models (late E46, E39, X5), use the standard OBD-II port inside the cabin. Incorrect connection is the #1 reason for “incompatibility” reports.
- ✔️【Read & Clear Fault Codes in Minutes】 Quickly diagnose why your SRS light is on. The scanner accurately reads fault codes from airbag and seatbelt pretensioner systems. With one button press, clear the codes and reset the SRS warning light in seconds. No expensive dealer tools needed.
- ✔️【User-Friendly for DIYers – No Mechanic Required】 Easy operation with an intuitive button layout: ‘Enter’ to confirm, ‘Scroll’ to navigate. The clear LCD screen shows results instantly. Includes a step-by-step manual (revised for clarity) to guide you through the entire reset process.
- ✔️【Reliable Support with 1-Year Warranty】 We stand behind the quality of our B800 scanner. It comes with a 1-Year Hassle-Free Warranty. If you have any questions or need support, please contact us with your Order ID, and our dedicated team will assist you promptly.
SEOCONTENT-START
TECHNICAL INSTRUCTIONS SAFETY RECALL 21TA08 SECOND-ROW OUTBOARD SEAT BELT COULD TEAR IN A CRASH CERTAIN 2022 MODEL YEAR SIENNA VEHICLES CONVERTED FOR WHEELCHAIR ACCESSIBILITY BY VANTAGE MOBILITY INTERNATIONAL (VMI) The repair quality of covered vehicles is extremely important to Toyota. All dealership technicians performing this repair are required to successfully complete the most current version of the E-Learning course “Safety Recall and Service Campaign Essentials”. To ensure that all vehicles have the repair performed correctly; technicians performing this recall repair are required to currently have completed all of the following courses: T623 – Toyota Electrical Circuit Diagnosis It is the dealership’s responsibility to select technicians with the above certification level or greater to perform this recall repair. Carefully review your resources, the technician skill level, and ability before assigning technicians to this repair. It is important to consider technician days off and vacation schedules to ensure there are properly trained technicians available to perform this repair at all times. 2 MOBILITY VEHICLE ELIGIBILITY Are Sienna vehicles that have been converted for wheelchair accessibility able to have the remedy performed? The remedy, can be applied to Sienna vehicles that have been converted for wheelchair accessibility by a Toyota-authorized mobility conversion company. Conversion of Sienna vehicles using non-Toyota-approved parts and/or accessories may make is difficult or impossible for a dealer to install the remedy parts for this Safety Recall. Who are the companies that have been authorized by Toyota to convert Sienna vehicles for wheelchair accessibility? Below is the list of companies that offer Toyota-authorized conversions for Sienna vehicles for wheelchair accessibility. • The Braun Corporation (BraunAbility) • Vantage Mobility International (VMI) What if a vehicle is converted by a non-authorized mobility conversion? Sienna vehicles that have been converted for wheelchair accessibility by a non-Toyota authorized mobility conversion company have undergone an unauthorized modification to the factory condition of the vehicle. These modifications may make it difficult or impossible to apply the remedy in their current condition. Toyota does not recommend modifying vehicles and cannot evaluate how any aftermarket, non-Toyota approved parts and/or modifications could affect a vehicle’s performance. Subject to individual review by the dealer and notwithstanding Toyota’s recommendation, some dealers may be willing to perform the Safety Recall remedy with the vehicle in its current modified condition. If your dealership is willing to do so, the customer may be responsible for the cost of parts and/or labor not otherwise covered by Toyota’s Safety Recall. Toyota provides the specific remedy parts, and covers 1.1 hours of dealership labor expenses. The customer is responsible to pay any additional charges for parts and/or labor which are the result of the vehicle’s non-Toyota-approved modifications. Toyota is not responsible for later performance problems the vehicle may have that are the result of the non-Toyota-approved vehicle modifications. 3 I. OPERATION FLOW CHART No further action required Not Covered Covered Campaign complete. Return the vehicle to the customer. Verify Vehicle Eligibility 1. Confirm vehicle VIN matches RO 2. Check Vehicle Inquiry System for campaign eligibility Replace the second row outboard seat belts LH and RH Perform verification Health Check and clear any DTC s No Has the vehicle been converted for wheelchair accessibility by the Braun Corporation (BraunAbility)? Refer to the BRAUN Sienna Mobility Vehicle Technical Instructions Yes Is the vehicle factory-condition? Refer to the Factory-Condition Vehicle Technical Instructions Yes No Has vehicle been converted for wheelchair accessibility by Vantage Mobility International (VMI)? Yes II. IDENTIFICATION OF AFFECTED VEHICLES • Check the TIS Vehicle Inquiry System to confirm that each VIN is eligible for this Special Service Campaign, and that it has not already been completed prior to dealer shipment or by another dealer. Note: TMNA warranty will not reimburse dealers for repairs completed on vehicles that are not affected or were completed by another dealer. 4 III. PREPARATION A. PARTS For Gray Trim (most common): Part Number Part Description Quantity 73370-08150-B0 BELT ASSY, REAR SEAT 3 POINT TYPE, OUTER LH 1 73360-08160-B0 BELT ASSY, REAR SEAT 3 POINT TYPE, OUTER RH 1 For Ivory Trim: Part Number Part Description Quantity 73370-08150-A0 BELT ASSY, REAR SEAT 3 POINT TYPE, OUTER LH 1 73360-08160-A0 BELT ASSY, REAR SEAT 3 POINT TYPE, OUTER RH 1 Note: The VMI MicroSpike rubber pad may need to be replaced. This part should be sourced from Vantage Mobility International (P/N → FN1628) B. TOOLS, SUPPLIES & EQUIPMENT • Techstream • Standard Hand Tools • Torque Wrench 5 IV. CHECK IF VEHICLE HAS BEEN CONVERTED FOR WHEELCHAIR ACCESSIBILITY 1. CHECK IF VEHICLE BEEN CONVERTED FOR WHEELCHAIR ACCESSIBILITY BY THE BRAUN CORPORATION (BRAUNABILITY). a) Refer to graphics on the left to confirm if vehicle was converted by the Braun Corporation. Was this Sienna converted by Braun? Use the BRAUN Sienna Mobility Vehicle Technical Instructions No Yes Continue to step 2 (below) to confirm if vehicle is factory-condition 2. CHECK IF VEHICLE IS FACTORY CONDITION a) Refer to graphics on the left to confirm if vehicle is factory-condition. Is this Sienna factory-condition? Use the Factory-Condition Sienna Technical Instructions Yes Continue to step 3 (below) to check if vehicle was converted by VMI No 3. CHECK IF VEHICLE BEEN CONVERTED FOR WHEELCHAIR ACCESSIBILITY BY VANTAGE MOBILITY INTERNATIONAL (VMI). a) Refer to graphics on the left to confirm if vehicle was converted by the VMI. Was this Sienna converted by VMI? You are using the correct instructions document. Go to section V (pg. 6) for remedy procedure instructions Yes FACTORY CONDITION 6 These instructions are for vehicles converted for wheelchair accesbility by VANTAGE MOBILITY INTERNATIONAL (VMI) V. REMOVE SECOND ROW OUTBOARD SEAT BELT ASSEMBLY (LR / RH) 1. RECORD SETTINGS OF THE AUDIO SYSTEM, AIR CONDITIONER, ETC. 2. CHECK FOR DTCs 3. MAKE SPACE FOR WORK 4. DISCONNECT THE NEGATIVE BATTERY CABLE • Wait at least 90 seconds after disconnecting the cable from the negative battery terminal to prevent airbag and seat belt pretension deployment. • Follow all precautions as outlined on TIS before servicing the SRS system. 5. REMOVE 3RD ROW BENCH SEAT (VMI Conversion) a) Remove the rear cargo cover by pulling the cover handle forward and up. b) Locate the four rear bench leg braces. c) Remove the indicated 3/8-18 bolts using a 9/16” socket. d) Disconnect the rear seat electrical harnesses. 7 e) Pull the seat release latches and remove both sections of the 3rd row bench seats. 6. REMOVE LOWER 3rd ROW PLASTICS (VMI Conversion) a) If MicroSpike rubber is installed on the 3rd-row footrest, peel back the covering to expose the six bolts. Note: This will destroy the adhesive backing and a new cover will need to be installed. Refer to VMI P/N FN1628. b) Remove the six flathead bolts from the footrest. c) Remove the footrest bar. b. REMOREMOVEVE 8 d) Remove the six footrest spacer tubes e) Remove the two screws in the lower joints between C-Middle and C-Corner plastics. f) Remove the two screws in the upper portion of the C-Middle plastic around the center bench dogbone. g) Remove the four screws connecting each C-Corner VMI plastic to the Toyota-factory installed quarter-panels. LEFT RIGHT 9 h) If a dome light (circled in yellow) is present on the passenger-side C-Corner plastic, disconnect the wiring. i) Remove the two corner C-plastics. The middle plastic may stay in place. 7. REMOVE THE SECOND ROW OUTBOARD SEAT BELT ASSEMBLIES (LH and RH) Refer to TIS for instructions on SEAT BELT / REAR NO. 1 SEAT OUTER BELT ASSEMBLY (for 60/40 Split Seat Type) / REMOVAL (Doc ID: RM100000001NT97). NOTE: Reference and perform the following procedures on TIS repair manual until the step “j” a) Disconnect the rear door opening trim weatherstrip LH & RH. b) Remove the quarter trim front lower cover LH & RH. c) Disconnect the No. 2 rear door wire LH & RH. d) Disconnect rear seat 3 point type outer belt assembly (remove floor anchor bolt LH & RH. e) Remove the rear seat outer belt cover LH & RH. f) Disconnect rear No. 2 seat outer belt assembly (remove c-pillar anchor bolt LH &RH. g) Remove the luggage hold belt striker assembly. h) Remove the back door scuff plate. i) Remove the spare wheel cover assembly (w/ spare tire). 10 j) Remove the Toyota factory quarter trim front panel assembly LH (refer to TIS repair manual). k) Disconnect the ramp deploy and SureDeploy switch cables from the back of the LH quarter panel assembly (VMI Converstion, picture to the left). l) Remove the Toyota factory quarter trim front panel assembly RH (refer to TIS repair manual). m) If the ParkSmart option is installed in the front of the RH quarter panel, disconnect its wires (VMI Converstion, picture to the left). n) Remove the rear window side garnish assembly LH & RH – (refer to TIS repair manual). f. DISCONNDISCONNECTECT 11 o) DO NOT REMOVE the rear shoulder belt anchor plate sub-assembly LH & RH p) Remove the nut to disconnect the shoulder anchor of the rear 3 point type outer belt assembly LH & RH. q) DO NOT REMOVE the rear shoulder belt anchor adjuster assembly LH & RH. r) Remove the 2 bolts. Disengage the 2 guides to separate the rear 3 point type outer belt assembly LH & RH. DO NOT REMOVE DO NOT REMOVE 12 s) Using a screwdriver with its tip wrapped in protective tape, pull out the locking button to release the lock to disconnect the pretensioner connector as shown in the illustration. *a Locking Button *b Protective Tape NOTE: Use the same procedure for LH side and RH side. VI. INSTALL NEW SECOND ROW OUTBOARD SEAT BELT ASSEMBLY (LR / RH) 1. CONFIRM THE “L” OR “R” MARK ON NEW SEAT BELT DO NOT install seat belt on incorrect side 2. INSTALL NEW REAR SEAT 3 POINT TYPE OUTER BELT ASSEMBLY LH AND RH Refer to TIS for instructions on SEAT BELT / REAR NO. 1 SEAT OUTER BELT ASSEMBLY (for 60/40 Split Seat Type) / INSTALLATION (Doc ID: RM100000001NT99). NOTE: Reference and perform the following procedures on in this document and then switch to TIS repair manual on step “f” a) Connect the pretensioner connector and lock the locking button as shown in the illustration. *a Locking Button *b Lock b) Engage the 2 guides to temporarily install the rear 3 point type outer belt assembly. c) Temporarily install the 2 bolts. d) Tighten the bolt (A) and then the bolt (B). Torque: Bolt (A) 12.5 N*m (127 kgf*cm, 9 ft.*lbf) Bolt (B) 42 N*m (428 kgf*cm, 31 ft.*lbf) 13 e) Install the shoulder anchor of the rear 3 point type outer belt assembly with the bolt Torque: 42 N*m (428 kgf*cm, 31 ft.*lbf) f) Install the rear window side garnish assembly (refer to TIS repair manual). g) Connect the wires for Ramp (pink arrow) and Sure Deploy (green arrow) switches in the LH quarter panel trim as shown (VMI conversion, picture to the left). h) Install the Toyota factory quarter trim front panel assembly LH (refer to TIS repair manual). i) Reconnect the ParkSmart button wires if vehicle is equipped with this option (VMI conversion, picture to the left). j) Install the Toyota factory quarter trim front panel assembly RH (refer to TIS repair manual). j. DISCONNDISCONNECTECT 14 k) Install the spare wheel cover assembly, vehicles w/ spare tire – (refer to TIS repair manual). l) Install back door scuff plate – (refer to TIS repair manual). m) Install luggage hold belt striker assembly – (refer to TIS repair manual). n) Connect the rear No. 2 seat outer belt assembly with the bolt – (refer to TIS repair manual). Torque: 42 Nm (428 kgf cm, 31 ft lbs) o) Install the rear seat outer belt cover – (refer to TIS repair manual). p) Thread the seatbelt through the slot in the VMI C-corner plastic (VMI conversion, picture to the left). q) Align the lower seatbelt bracket at the approximate angle matching the slots in the VMI C-corner plastics (VMI conversion, picture to the left). r) Install floor anchor bolt (VMI conversion, picture to the left). Torque: 42 Nm (428 kgf cm, 31 ft lbs) s) Connect the No. 2 rear door wire. Torque: 11 Nm (112 kgf cm, 8 ft lbs) t) Install the quarter trim front lower cover. u) Connect the rear door opening trim weatherstrip. v) Install quarter trim front lower cover w) Connect rear door opening trim weather strip x) Install the rear door scuff plate NOTE: Use the same procedure for LH side and RH side. 15 3. INSTALL VMI C-PILLAR PLASTICS (VMI Conversion) a) Position the C-Pillar Middle Trim, MP9515 so it fits between the rear bench dog bone mounting points. NOTE: Rear bench is not installed at this point. b) If the passenger-side C-Pillar plastic’s dome light was disconnected, reconnect the wires. c) Reinstall the 4X Self Tap Screws into the LH C-pillar plastic using the existing holes. NOTE: Ensure the middle C-plastic is sitting flat with no bulges and is behind the corner plastics. 16 d) Reinstall the 4X Self Tap Screws into the RH C-pillar plastic using the existing holes. NOTE: Ensure the middle C-plastic is sitting flat with no bulges and is behind the corner plastics. e) Reinstall the lower screw joining the middle C-plastic to the corner plastics (LH) 17 f) Reinstall the lower screw joining the middle C-plastic to the corner plastics (RH) g) Reinstall the upper two screws on either side of the middle bench seat dog bone. 4. REINSTALL BENCH FOOTREST (VMI Conversion) h) Insert the six footrest spacers into the slots in the C-plastics. Align them with the threaded holes in the frame. 18 i) Place the footrest on top of the spacers with the countersunk side facing up. Align the six holes with the spacers j) Reinstall the 6x bolts using a 3/16 hex head. Do NOT torque these bolts. k) Install a new Footrest Microspike FN1628 strip on top of the footrest bar, being careful to align all corners. 19 5. REINSTALL 3RD ROW BENCH SEAT (VMI Conversion) a) Install the front legs of the 3rd row bench seat in their dog bones. b) Before latching the rear bench legs in place, align the reinforcement bracket slots with the threaded holes in the frame. Then latch the bench legs in place. c) Reinstall washer and bolt for rear bench brackets Torque: 42 Nm (428 kgf cm, 31 ft lbs) 20 d) Place the rear cargo cover behind bench and ensure the handle insert locks into place within the cutout in the rear hatch scuff plate. 6. RECONNECT THE NEGATIVE BATTERY CABLE 7. INSPECT SRS WARNING LIGHT f) Check that the airbag warning light lights when the power switch is turned on. g) Check that the airbag warning light goes off approximately 6 seconds after turning on of the ignition switch. NOTE: If the airbag warning light remains on, it is likely to be caused by connection failure of the pretensioner connector. 8. CHECK FOR DTCs 9. Refer to TIS for instructions on General / SETUP / WHEN DISCONNECTING OR RECONNECTING BATTERY TERMINAL / WORK PROCEDURE (Doc ID: RM100000001O3VN) 10. RETURN THE VEHICLE TO THE ORIGINAL STATE ◄ VERIFY REPAIR QUALITY ► • Confirm applicable initializations have been performed. • Confirm there are no DTC’s after the replacement VII. APPENDIX A. PARTS DISPOSAL In accordance with Federal law, please make sure all recalled parts (original parts) removed from the vehicle are disposed of in a manner in which they will not be reused, unless requested for parts recovery return. 21 Examples: 19TA01 = Launched in 2019, Toyota, Safety Recall Remedy Phase, 1st Safety Recall Launched in 2019 20TC02 = Launched in 2020, Special Service Campaign, 2nd Special Service Campaign Launched in 2020 21TE05 = Launched in 2021, Customer Support Program, 5th Customer Support Program Launched in 2021 Campaign Designation / Phase Decoder
**************************************************************************************************************
SEOCONTENT-END
This product presentation was made with AAWP plugin.