
TECHNICAL INSTRUCTIONS
FOR
SAFETY (NONCOMPLIANCE) RECALL 22LA01
Vehicle Stability Control System May Not Default to “On”
Certain 2021 – 2022 Model Year LS 500h
Certain 2022 Model Year LX 600
Certain 2022 Model Year NX 350h
Certain 2022 Model Year NX 450h+
Update 7/21/22
– Added step in section VIII. to check for Fan Operation
BACKGROUND
A software error can cause the Vehicle Stability Control system (VSC) not to default to “ON” the next time the car is started under certain circumstances. This can result in noncompliance with a federal safety requirement. Operating the vehicle with VSC deactivated could increase the risk of a crash in certain driving conditions.
RECALL 22LA01 – Vehicle Stability Control System May Not Default to “On” – 2021-2022 Lexus
Remedy Instructions and TSB
RCRIT-22V239-4922.pdf 1540.947KB
Remedy Instructions and TSB
RCRIT-22V239-7693.pdf 1538.424KB
Latest Recalls Documents
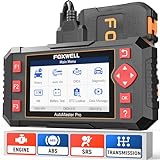
- [Easy to Use—Work Out of the Box] + [FOXWELL 2026 New Version] FOXWELL NT604 Elite scan tool is the 2026 new version from FOXWELL, designed for car owners who want to figure out the cause of issues before fixing car problems by scanning common systems like ABS, SRS, engine, and transmission. The NT604 Elite obd2 scanner diagnostic tool comes with the latest software—no need to waste time downloading software first. Plug the scanner into the OBDII port with OBDII cable to start the diagnosis.
- [Affordable] + [Reliable Car Health Monitor] Will you be confused what happens when the warning light of ABS/SRS/transmission/check engine flashes? Instead of taking your cars to dealership, this FOXWELL scanner will help you do a thorough scanning and detection for your cars and pinpoint the root cause. Note:The device is a diagnostic tool, not a repair tool. To turn off a warning light, you must first physically repair the issue causing it. Only then can the scanner be used to clear the corresponding fault code.
- [5 in 1 Car Diagnostic Scanner] Compared with obd scanners (50-100), NT604 Elite code scanner not only includes their OBDII diagnosis but also serves as ABS/SRS scanner, transmission and check engine code reader. When it’s an odb2 scanner, you can use it to check if your car is ready for annual test through I/M readiness menu. In addition, live data stream, built-in DTC library, data play back and print, all these features are a big plus for it. Note: doesn't support maintenance functions like reset or relearn. For the SRS system, NT604 Elite can read and clear common fault codes not caused by a crash, but crash/collision data cannot be cleared.
- [Fantastic AUTOVIN] + [No extra software fee] Through the AUTOVIN menu, this NT604 Elite car scanner allows you to get your V-IN and vehicle info rapidly, no need to take time to find your V-IN and input one by one. What's more, the NT604 Elite ABS SRS scanner supports 60+ car brands from worldwide (America/Asia/Europe). You don’t need to pay extra software fee. AUTOVIN may not work on some older vehicles or certain vehicle brands. If AUTOVIN fails, please input the vin code manually or go to the Diagnostic Menu to select your vehicle model.
- [Solid protective case KO plastic carrying bag] + [Lifetime update] Almost all same price-level car scanner diagnostic tool only offers plastic bag to hold the scanner.However, NT604 Elite automotive scanner is equipped with solid protective case, preventing your obd2 scanner from damage. Then you don’t need to pay extra money to buy a solid toolbox.
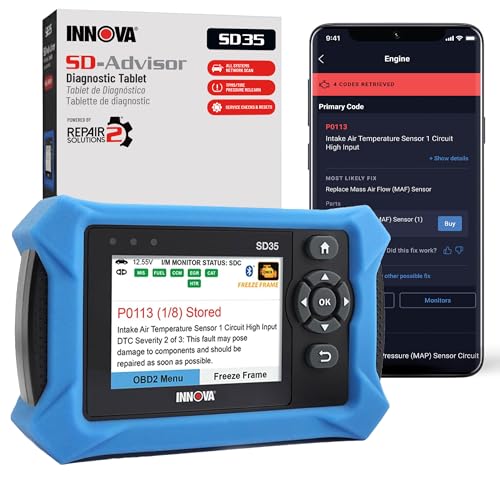
- OBD2 SCANNER FOR ALL SYSTEMS – The INNOVA SD35 is a tablet-based OBD2 scanner designed for advanced diagnostics. Read and clear check engine light, ABS, SRS, and TPMS codes, plus test your car battery and alternator to prevent unexpected failures. Vehicle coverage may vary. Please use Innova’s Coverage Checker to verify compatibility.
- ALL-SYSTEM DIAGNOSTICS & LIVE DATA – Unlike basic code readers, this OBD2 scanner for all vehicles scans engine, transmission, ABS, SRS, and more. Get real-time live data, including RPM, fuel trims, temperature readings, and oxygen sensor performance.
- OBD2 TABLET WITH USER-FRIENDLY INTERFACE – This automotive scan tool features a high-resolution display, making vehicle diagnostics faster and easier.
- ADVANCED TPMS, OIL RESET & SERVICE FUNCTIONS – Perform TPMS sensor checks, oil light reset, and other service resets with ease This professional diagnostic tool provides comprehensive vehicle maintenance capabilities in one device.
- WIDE VEHICLE COVERAGE (1996 & NEWER CARS & TRUCKS) – This OBD2 scanner Bluetooth tablet is compatible with Toyota, Ford, Honda, Chevrolet, Nissan, Dodge, and more. However, feature coverage may vary. Please use Innova's Coverage Checker to verify coverage.
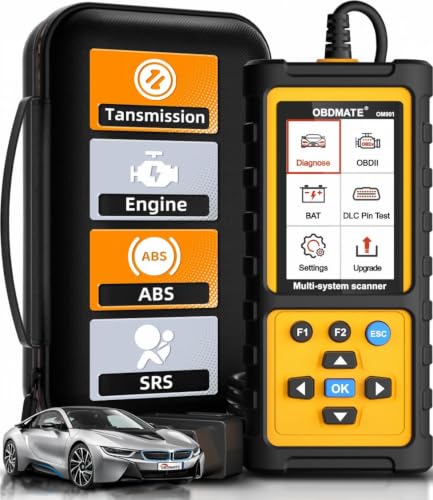
- 【Reset ABS/SRS/Transmission/Engine Lights】 More than an check engine code reader, OBDMATE OM901 obd2 scanner performs comprehensive diagnostics for the 4 most-used systems (ABS/SRS/Engine/Transmission). It quickly clears fault codes, turns off warning lights, read data stream and auto VIN.
- 【3.5" Handheld Scanner with 4 System Diagnose】 3.5" Super large TFT screen equipped displays an intuitive menu and clear readings of various sensors from ABS, SRS, ECM and TCM systems. It arrived with a silicone protective case and hard-shell carrying case, ensuring long-lived durability and drop resistance. The car diagnostic tool is plug-to-play designed, plug it and get diagnosis started without any batteries or updates required.
- 【One-Click I/M Readines&Full OBD2 Functions】 Press F1 to get an intuitive corloured form about whether various emissions-related systems on the vehicle are operating properly. Help you get smog-check ready quickly. OM901 car scanner supports all essential OBD2 functions you need: read & clear codes, view freeze frame, read I/M readiness, retrieve VIN, live data stream (with graphing display), O2 sensor test, onboard monitoring mode, and EVAP leak test.
- 【Battery Voltage Check&DLC Pin Test】 It allows you to monitor battery health by testing current battery voltage. Plus, this obd2 diagnostic tool features DLC 16-PIN test to check current voltage of every pin.
- 【Automotive Scanner Diagnostic Kit】 The package comes with 1 car scanner, 1 USB-type c cable, 1 hard storage bag and 1 user manual(en). Free to update without any hidden fees. 5 languanges available in setting including English, French, Italian, German and Espanish. Valuable and Portable, making it a great tool kit for car owners, DIY enthusiasts, and professional mechanics.
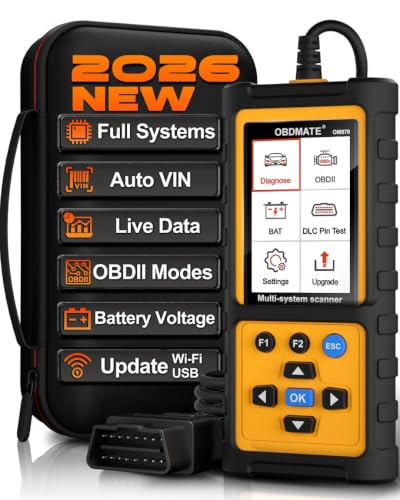
- 【Full Systems Automotive Diagnostic】 More than checking engine, ABS and SRS, OBDMATE OM970 obd2 scanner performs comprehensive diagnostics on all electric modules. It quickly scans and clears fault codes, turns off warning lights, reads live data, and features Auto-VIN technology.
- 【Live Datastream&4-in-1 Graph】 Easily view live sensor data such as RPM, fuel trims, ATF temperature, wheel speed sensor, battery voltage and so on. OM970 scan tool also supports 4-in-1 trend graphing. Spend just 3 minutes to check – and you'll know exactly what's going wrong, helping you avoid hundreds in dealership diagnostic fees.
- 【One-Click I/M Readiness&Full OBD2 Functions】 Press F1 to get an intuitive corloured form about whether your vehicle's emissions-related systems are operating properly. Help you get smog-check ready quickly. OM970 obd2 diagnostic tool supports all essential OBD2 functions you need. Plus, it features battery voltage test and DLC 16-PIN test.
- 【Straightforward Menus with Easy Navigation】 All functions are easy to understand without obscure decriptions. 3.5" Large screen delivers clear readings while keeping one-hand operation. The car diagnostic tool comes with a silicone protective case and a hard-shell carrying case, ensuring long-lived durability and drop resistance.
- 【Budget-Friendly, No Subscriptions, Free Software Updates】 Plug and play: no bluetooth pairing, monthly fees, Wi-Fi connection, or any other troublesome initial settings. OM970 obd2 scanner works out of the box with the latest software. Lifetime free upgrade.
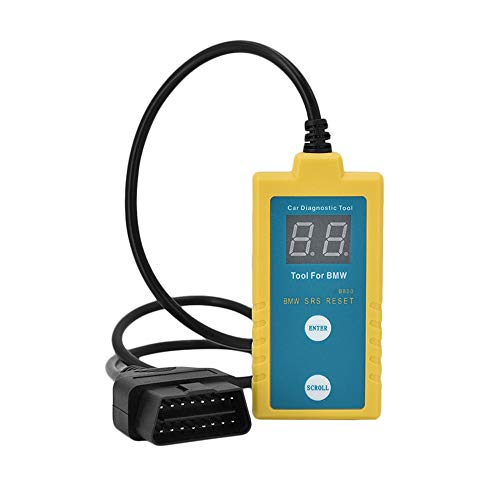
- ✔️【Professional SRS Reset for 1994-2003 BMW】 Designed specifically for classic BMW models (1994-2003). This B800 scanner reads & clears SRS airbag fault codes, turns off the warning light, and saves you a costly dealer visit. Confirmed compatible with: E36, E46 (EXCEPT 2001 330i), E34, E38, E39, Z3, and X5 (E53). NOT compatible with any BMW built before 1994 or after 2003.
- ✔️【Important: Two Different Connection Ports – Read Before Use】 To avoid “not working” issues, please note: For 1994–2000 BMWs (most E36, E34, Z3, early E39), the SRS diagnostic port is a round 20-pin connector under the hood. You MUST use the included 16-pin to 20-pin adapter cable. For 2000–2003 models (late E46, E39, X5), use the standard OBD-II port inside the cabin. Incorrect connection is the #1 reason for “incompatibility” reports.
- ✔️【Read & Clear Fault Codes in Minutes】 Quickly diagnose why your SRS light is on. The scanner accurately reads fault codes from airbag and seatbelt pretensioner systems. With one button press, clear the codes and reset the SRS warning light in seconds. No expensive dealer tools needed.
- ✔️【User-Friendly for DIYers – No Mechanic Required】 Easy operation with an intuitive button layout: ‘Enter’ to confirm, ‘Scroll’ to navigate. The clear LCD screen shows results instantly. Includes a step-by-step manual (revised for clarity) to guide you through the entire reset process.
- ✔️【Reliable Support with 1-Year Warranty】 We stand behind the quality of our B800 scanner. It comes with a 1-Year Hassle-Free Warranty. If you have any questions or need support, please contact us with your Order ID, and our dedicated team will assist you promptly.
SEOCONTENT-START
TECHNICAL INSTRUCTIONS FOR SAFETY (NONCOMPLIANCE) RECALL 22LA01 Vehicle Stability Control System May Not Default to “On” Certain 2021 – 2022 Model Year LS 500h Certain 2022 Model Year LX 600 Certain 2022 Model Year NX 350h Certain 2022 Model Year NX 450h+ The repair quality of covered vehicles is extremely important to Toyota. All dealership technicians performing this special service campaign are required to successfully complete the most current version of the E-Learning course “Safety Recall and Service Campaign Essentials”. To ensure that all vehicles have the repair performed correctly; technicians performing this special service campaign repair are required to currently have completed all of the following courses: – L623 Lexus Electrical Circuit Diagnosis It is the dealership’s responsibility to select technicians that have completed the above courses to perform this repair. Carefully review your resources, the technician skill level, and ability before assigning technicians to this repair. It is important to consider technician days off and vacation schedules to ensure there are properly trained technicians available to perform this repair at all times. 2 I. OPERATION FLOW CHART II. IDENTIFICATION OF AFFECTED VEHICLES • Check the TIS Vehicle Inquiry System to confirm the VIN is involved in this Campaign, and that it has not already been completed prior to dealer shipment or by another dealer. • TMS warranty will not reimburse dealers for repairs completed on vehicles that are not affected or were completed by another dealer. III. PREPARATION A. TOOLS, SUPPLIES & EQUIPMENT • Standard Hand Tools • Techstream ADVi / Techstream 2.0 / Techstream Lite • DCA-8000P Battery Diagnostic Tool • L-SB-0001-18 No Covered Yes Perform Health Check. Is a Update available for the Brake/EPB System? Update the Skid Control ECU CID’s. Not Covered Verify Vehicle Eligibility 1.Confirm vehicle VIN matches the RO. 2.Check Vehicle Inquiry System for Campaign eligibility. No further action required. Campaign completed, return the vehicle to the customer. Perform Verification Heath Check 3 IV. BACKGROUND A software error can cause the Vehicle Stability Control system (VSC) not to default to “ON” the next time the car is started under certain circumstances. This can result in noncompliance with a federal safety requirement. Operating the vehicle with VSC deactivated could increase the risk of a crash in certain driving conditions. 4 V. DETERMINE STATUS OF CURRENT CALIBRATION 1. CHECK FOR DTC’S a. Using a Techstream, perform a Health Check to check for any Diagnostic Trouble Codes. NOTICE: This Campaign covers only the Calibration ID update to the Brake/EPB system, as detailed in these instructions. It does not cover the diagnosis or replacement of any other issues on the vehicle. For LS w/ advanced drive, make sure to use a VIM which supports Ethernet communication. NOTICE: Before completing Health Check, “Send Vehicle Information” window may be displayed. If displayed, then click “Yes” to send the vehicle information. • If “Failed to send data to the server” is displayed, click “No” to close the window and proceed to the next step. 5 2. CHECK CURRENT CALIBRATION a. Locate the Update column for the Brake/EPB System in the Stored Data tab for this vehicle. b. Determine the status of an available update for the Brake/EPB System; indicated by a YES or NO. Is there an update available to the Brake/EPB System? No update is necessary. Campaign is complete. Proceed to section VI. Vehicle preparation on p. 6 Yes No 6 VI. VEHICLE PREPERATION 1. VEHICLE PREPARATION a. Confirm the following conditions: • Vehicle in the IG position (engine off). • Transaxle in Park. • Parking brake engaged. • Turn off all electrical accessories (i.e. climate control, audio system, etc.) • Headlight switch in the DRL OFF position. • Windshield wiper switch in the OFF position. 2. DISCONNECT COOLING FAN a. Disconnect the electrical connector from the cooling fan on the radiator fan shroud. If the cooling fans run during the Calibration update procedure, the battery voltage will be inconsistent and could cause damage to the control module(s). NOTICE: The illustration is an example of NX. 3. PRESSURIZE HYDRO-BOOSTER a. Depress the brake pedal fully 2 times within 2 seconds b. Release brake pedal c. Wait 10 seconds NOTICE: You may hear the hydro-boost pump run for a few seconds when completing these steps. The procedure will prevent the pump from running during the re-flash procedure. 4. CONNECT THE 12v BATTERY TO A POWER SUPPLY (DCA-8000) a. Connect the DCA-8000 or other type of a power supply (not a battery charger) to the 12v battery. b. Tap the Reflash icon from the Main Menu screen of the DCA-8000. A power supply MUST be used during reprogramming. Please ensure DCA-8000 is connected and set to power supply mode. Voltage MUST be set to 13.5V. Power supply must be connected directly to the 12v battery terminals and NOT the remote jump posts under the hood (if equipped). ***ECU damage will occur if the battery voltage is not properly maintained during this re-flash procedure. 7 5. VERIFY TECHSTREAM SETUP a. Verify that the Techstream meets the following conditions: • The latest version of software is loaded. • The Techstream battery is fully charged. If not, connect the Techstream to a 120v source. • The DLCIII cable is in good condition. The Techstream’s battery voltage MUST be maintained during the update procedure. If necessary, plug the Techstream into a 120v outlet during this procedure. ***If the Techstream’s communication with the vehicle fails during the update procedure, the ECU will be damaged. b. This vehicle has additional security measures requiring a signature from the server when performing ECU reprogramming. 8 VII. UPDATE CALIBRATION 1. UPDATE THE CID’S FOR THE FRONT RECOGNITION CAMERA SYSTEM a. Identify the vehicles Original CID for the Brake/EPB System on the Stored Data tab. b. Locate the vehicles Original CID in the chart below. c. Select the corresponding NEW CID link to load the update. Model Current Calibration ID NEW Calibration ID LS 500h F15265087100 F152650L6000 F15265087200 F15265087300 F15265087400 LX 600 F15266063100 F15266063200 NX 350h F15267832500 F15267832600 NX 450h+ F15267832500 F15267832600 NOTICE: • While reprogramming, keep IG ON. Never turn the IG off or ENGINE-START. • As reprogramming completes within approximately 30 minutes, stay near the vehicle and DO NOT allow any third parties to operate the vehicle or TS in order to prevent issues from occurring. • Never turn the IG off other than instructed. Otherwise, the ECU could be damaged. • Pressing the “Cancel” button or the “X” button on the top right means to cancel reprogramming and could damage the ECU while reprogramming. Be sure to press “Retry” to continue reprogramming. • The ECU unlock procedure is handled by the Calibration Update Wizard BEFORE starting to upload the NEW software. 9 IMPORTANT: ADDITIONAL SECURITY MEASURES REQUIRING A SIGNATURE FROM SERVER d. Click Next to start the calibration update process. e. Confirm the following: • PC is connected to VIM. • VIM is connected to DLC3 connector. • Ignition is ON and engine is OFF or READY OFF (hybrid vehicles). • Select correct device tool Then, click Next. f. Verify correct current and NEW calibration information, then click Next. 10 g. Turn Ignition OFF, then click Next. h. Confirm the following: • PC is connected to VIM. • Ignition is ON and engine is OFF or READY OFF (hybrid vehicles). • Hood is Open • All accessories are OFF. • Battery voltage is above 11.8V Then, click Start i. This vehicle is equipped with additional security measures requiring a Signature from TIS. Select Next to open TIS and retrieve the Signature. 11 j. Input TIS login credentials and select Login. k. Input TIS login credentials for secondary authentication and select Login. l. Select Send m. Copy the Signature from TIS. n. Paste the Signature into Techstream and select Next. 12 o. Do NOT disturb the vehicle during flash reprogramming. p. Turn the ignition OFF for a minimum of 10 seconds, then click Next. q. Turn the Ignition to the ON position, then click Next. 13 VIII. COMPLETE REPAIR 1. CONNECT COOLING FAN a. Connect the electrical connector to the cooling fan motor on the radiator fan shroud. 2. CONFIRMATION OF MIL OFF a. Activate the hybrid system and confirm that the Malfunction Indicator Lamp (MIL) in the combination meter assembly is not illuminated. NOTICE: If MIL is off, it is unnecessary to perform the next step. r. Confirm calibrations were updated then click Finish. 14 b. It is necessary that 4 Ready OFF/ON cycles be performed to turn off the MIL. Follow the steps below. • For all models except NX450h+ The interval from Ready OFF to Ready ON should be more than 5 minutes, and from Ready ON to Ready OFF should be more than 10 seconds. • For NX 450h+ The interval from Ready OFF to Ready ON should be more than 10 minutes, and from Ready ON to Ready OFF should be more than 20 seconds. • After performing the step above, confirm the MIL is off. • DO NOT depress the brake pedal or open/close the driver-side door during the 5 minutes (10 minutes for NX450h+) with Ready OFF. Ensure operation is performed after the 5 minutes (10 minutes for NX450h+) have passed. • If the brake pedal is depressed or driver-side door is opened/closed during the 5 minutes (10 minutes for NX450h+) with Ready OFF, start the cycle to turn off the MIL from the beginning. All models except NX450h+ NX450h+ 15 3. PERFORM VERIFICATION HEALTH CHECK a. Using a Techstream, perform a Health Check. b. Clear DTC’s that may have set during the re-flash procedure. c. Re-run the Health Check to confirm that no DTC’s reappear. THIS VERIFICATION HEALTH CHECK IS NECESSARY to update the results and CID’s to the National database. 4. CONFIRM CID UPDATE a. On the Stored Data tab, confirm the following for the Brake/ECB Systems: • The Calibration number has the “New CID” number. • The “Update” column says “No”. 16 5. PRINT CUSTOMER HEALTH CHECK REPORT a. From the Stored Data tab, select the Customer Health Check Report button (TIS will launch when button is pressed). b. Log in to TIS. c. Input Vehicle Mileage and Repair Order number. d. Check the “Performed” campaign button for the applicable campaigns. e. Select the Report button. f. Confirm Customer Health Check Report information is correct. g. Print Customer Health Check Report from TIS. h. Sign and provide to the customer. IX. REASSEMBLY 1. REMOVE THE POWER SUPPLY FROM THE BATTERY ◄ VERIFY REPAIR QUALITY ► − Confirm the cooling fans are re-connected. − Confirm the system Calibration has been updated successfully. − Confirm there are no DTC’s after the Calibration update. A. PARTS DISPOSAL In accordance with Federal law, please make sure all recalled parts (original parts) removed from the vehicle are disposed of in a manner in which they will not be reused, unless requested for parts recovery return. 17 1919 = 201920 = 202021 = 202122 = 202223 = 2023Etc…Year Campaignis Launched19TA01TT = ToyotaL = LexusVehicle MakeAA = Safety Recall RemedyB = Safety Recall InterimC = Special Service CampaignD = Limited Service CampaignE = Customer Support ProgramF = Emissions Recall(May use other characters in unique cases)Field Action Category and Phase0101 = 1st Field Action of the year02 = 2nd Field Action of the year03 = 3rd Field Action of the year(The sequence is unique for each Field Action category)(May use other characters in unique cases)Field Action Sequence Examples: 19TA01 = Launched in 2019, Toyota, Safety Recall Remedy Phase, 1st Safety Recall Launched in 2019 20TC02 = Launched in 2020, Special Service Campaign, 2nd Special Service Campaign Launched in 2020 21TE05 = Launched in 2021, Customer Support Program, 5th Customer Support Program Launched in 2021 Campaign Designation / Phase Decoder
**************************************************************************************************************
TECHNICAL INSTRUCTIONS FOR SAFETY (NONCOMPLIANCE) RECALL 22LA01 Vehicle Stability Control System May Not Default to “On” Certain 2021 – 2022 Model Year LS 500h Certain 2022 Model Year LX 600 Certain 2022 Model Year NX 350h Certain 2022 Model Year NX 450h+ Update 7/21/22 – Added step in section VIII. to check for Fan Operation The repair quality of covered vehicles is extremely important to Toyota. All dealership technicians performing this special service campaign are required to successfully complete the most current version of the E-Learning course “Safety Recall and Service Campaign Essentials”. To ensure that all vehicles have the repair performed correctly; technicians performing this special service campaign repair are required to currently have completed all of the following courses: – L623 Lexus Electrical Circuit Diagnosis It is the dealership’s responsibility to select technicians that have completed the above courses to perform this repair. Carefully review your resources, the technician skill level, and ability before assigning technicians to this repair. It is important to consider technician days off and vacation schedules to ensure there are properly trained technicians available to perform this repair at all times. 2 I. OPERATION FLOW CHART II. IDENTIFICATION OF AFFECTED VEHICLES • Check the TIS Vehicle Inquiry System to confirm the VIN is involved in this Campaign, and that it has not already been completed prior to dealer shipment or by another dealer. • TMS warranty will not reimburse dealers for repairs completed on vehicles that are not affected or were completed by another dealer. III. PREPARATION A. TOOLS, SUPPLIES & EQUIPMENT • Standard Hand Tools • Techstream ADVi / Techstream 2.0 / Techstream Lite • DCA-8000P Battery Diagnostic Tool • L-SB-0001-18 No Covered Yes Perform Health Check. Is a Update available for the Brake/EPB System? Update the Skid Control ECU CID’s. Not Covered Verify Vehicle Eligibility 1.Confirm vehicle VIN matches the RO. 2.Check Vehicle Inquiry System for Campaign eligibility. No further action required. Campaign completed, return the vehicle to the customer. Perform Verification Heath Check 3 IV. BACKGROUND A software error can cause the Vehicle Stability Control system (VSC) not to default to “ON” the next time the car is started under certain circumstances. This can result in noncompliance with a federal safety requirement. Operating the vehicle with VSC deactivated could increase the risk of a crash in certain driving conditions. 4 V. DETERMINE STATUS OF CURRENT CALIBRATION 1. CHECK FOR DTC’S a. Using a Techstream, perform a Health Check to check for any Diagnostic Trouble Codes. NOTICE: This Campaign covers only the Calibration ID update to the Brake/EPB system, as detailed in these instructions. It does not cover the diagnosis or replacement of any other issues on the vehicle. For LS w/ advanced drive, make sure to use a VIM which supports Ethernet communication. NOTICE: Before completing Health Check, “Send Vehicle Information” window may be displayed. If displayed, then click “Yes” to send the vehicle information. • If “Failed to send data to the server” is displayed, click “No” to close the window and proceed to the next step. 5 2. CHECK CURRENT CALIBRATION a. Locate the Update column for the Brake/EPB System in the Stored Data tab for this vehicle. b. Determine the status of an available update for the Brake/EPB System; indicated by a YES or NO. Is there an update available to the Brake/EPB System? No update is necessary. Campaign is complete. Proceed to section VI. Vehicle preparation on p. 6 Yes No 6 VI. VEHICLE PREPERATION 1. VEHICLE PREPARATION a. Confirm the following conditions: • Vehicle in the IG position (engine off). • Transaxle in Park. • Parking brake engaged. • Turn off all electrical accessories (i.e. climate control, audio system, etc.) • Headlight switch in the DRL OFF position. • Windshield wiper switch in the OFF position. 2. DISCONNECT COOLING FAN a. Disconnect the electrical connector from the cooling fan on the radiator fan shroud. If the cooling fans run during the Calibration update procedure, the battery voltage will be inconsistent and could cause damage to the control module(s). NOTICE: The illustration is an example of NX. 3. PRESSURIZE HYDRO-BOOSTER a. Depress the brake pedal fully 2 times within 2 seconds b. Release brake pedal c. Wait 10 seconds NOTICE: You may hear the hydro-boost pump run for a few seconds when completing these steps. The procedure will prevent the pump from running during the re-flash procedure. 4. CONNECT THE 12v BATTERY TO A POWER SUPPLY (DCA-8000) a. Connect the DCA-8000 or other type of a power supply (not a battery charger) to the 12v battery. b. Tap the Reflash icon from the Main Menu screen of the DCA-8000. A power supply MUST be used during reprogramming. Please ensure DCA-8000 is connected and set to power supply mode. Voltage MUST be set to 13.5V. Power supply must be connected directly to the 12v battery terminals and NOT the remote jump posts under the hood (if equipped). ***ECU damage will occur if the battery voltage is not properly maintained during this re-flash procedure. 7 5. VERIFY TECHSTREAM SETUP a. Verify that the Techstream meets the following conditions: • The latest version of software is loaded. • The Techstream battery is fully charged. If not, connect the Techstream to a 120v source. • The DLCIII cable is in good condition. The Techstream’s battery voltage MUST be maintained during the update procedure. If necessary, plug the Techstream into a 120v outlet during this procedure. ***If the Techstream’s communication with the vehicle fails during the update procedure, the ECU will be damaged. b. This vehicle has additional security measures requiring a signature from the server when performing ECU reprogramming. 8 VII. UPDATE CALIBRATION 1. UPDATE THE CID’S FOR THE Brake/EPB SYSTEM a. Identify the vehicles Original CID for the Brake/EPB System on the Stored Data tab. b. Locate the vehicles Original CID in the chart below. c. Select the corresponding NEW CID link to load the update. Model Current Calibration ID NEW Calibration ID LS 500h F15265087100 F152650L6000 F15265087200 F15265087300 F15265087400 LX 600 F15266063100 F15266063200 NX 350h F15267832500 F15267832600 NX 450h+ F15267832500 F15267832600 NOTICE: • While reprogramming, keep IG ON. Never turn the IG off or ENGINE-START. • As reprogramming completes within approximately 30 minutes, stay near the vehicle and DO NOT allow any third parties to operate the vehicle or TS in order to prevent issues from occurring. • Never turn the IG off other than instructed. Otherwise, the ECU could be damaged. • Pressing the “Cancel” button or the “X” button on the top right means to cancel reprogramming and could damage the ECU while reprogramming. Be sure to press “Retry” to continue reprogramming. • The ECU unlock procedure is handled by the Calibration Update Wizard BEFORE starting to upload the NEW software. 9 IMPORTANT: ADDITIONAL SECURITY MEASURES REQUIRING A SIGNATURE FROM SERVER d. Click Next to start the calibration update process. e. Confirm the following: • PC is connected to VIM. • VIM is connected to DLC3 connector. • Ignition is ON and engine is OFF or READY OFF (hybrid vehicles). • Select correct device tool Then, click Next. f. Verify correct current and NEW calibration information, then click Next. 10 g. Turn Ignition OFF, then click Next. h. Confirm the following: • PC is connected to VIM. • Ignition is ON and engine is OFF or READY OFF (hybrid vehicles). • Hood is Open • All accessories are OFF. • Battery voltage is above 11.8V Then, click Start i. This vehicle is equipped with additional security measures requiring a Signature from TIS. Select Next to open TIS and retrieve the Signature. 11 j. Input TIS login credentials and select Login. k. Input TIS login credentials for secondary authentication and select Login. l. Select Send m. Copy the Signature from TIS. n. Paste the Signature into Techstream and select Next. 12 o. Do NOT disturb the vehicle during flash reprogramming. p. Turn the ignition OFF for a minimum of 10 seconds, then click Next. q. Turn the Ignition to the ON position, then click Next. 13 VIII. COMPLETE REPAIR 1. CONNECT COOLING FAN a. Connect the electrical connector to the cooling fan motor on the radiator fan shroud. 2. CHECK THE OPERATION OF THE ELECTRIC FAN a. READY ON the vehicle. b. Turn the air conditioner ON to check if the electric fan operates. 3. CONFIRMATION OF MIL OFF a. Activate the hybrid system and confirm that the Malfunction Indicator Lamp (MIL) in the combination meter assembly is not illuminated. NOTICE: If MIL is off, it is unnecessary to perform the next step. r. Confirm calibrations were updated then click Finish. 14 b. It is necessary that 4 Ready OFF/ON cycles be performed to turn off the MIL. Follow the steps below. • For all models except NX450h+ The interval from Ready OFF to Ready ON should be more than 5 minutes, and from Ready ON to Ready OFF should be more than 10 seconds. • For NX 450h+ The interval from Ready OFF to Ready ON should be more than 10 minutes, and from Ready ON to Ready OFF should be more than 20 seconds. • After performing the step above, confirm the MIL is off. • DO NOT depress the brake pedal or open/close the driver-side door during the 5 minutes (10 minutes for NX450h+) with Ready OFF. Ensure operation is performed after the 5 minutes (10 minutes for NX450h+) have passed. • If the brake pedal is depressed or driver-side door is opened/closed during the 5 minutes (10 minutes for NX450h+) with Ready OFF, start the cycle to turn off the MIL from the beginning. All models except NX450h+ NX450h+ 15 4. PERFORM VERIFICATION HEALTH CHECK a. Using a Techstream, perform a Health Check. b. Clear DTC’s that may have set during the re-flash procedure. c. Re-run the Health Check to confirm that no DTC’s reappear. THIS VERIFICATION HEALTH CHECK IS NECESSARY to update the results and CID’s to the National database. 5. CONFIRM CID UPDATE a. On the Stored Data tab, confirm the following for the Brake/ECB Systems: • The Calibration number has the “New CID” number. • The “Update” column says “No”. 16 6. PRINT CUSTOMER HEALTH CHECK REPORT a. From the Stored Data tab, select the Customer Health Check Report button (TIS will launch when button is pressed). b. Log in to TIS. c. Input Vehicle Mileage and Repair Order number. d. Check the “Performed” campaign button for the applicable campaigns. e. Select the Report button. f. Confirm Customer Health Check Report information is correct. g. Print Customer Health Check Report from TIS. h. Sign and provide to the customer. IX. REASSEMBLY 1. REMOVE THE POWER SUPPLY FROM THE BATTERY ◄ VERIFY REPAIR QUALITY ► − Confirm the cooling fans are re-connected. − Confirm the system Calibration has been updated successfully. − Confirm there are no DTC’s after the Calibration update. A. PARTS DISPOSAL In accordance with Federal law, please make sure all recalled parts (original parts) removed from the vehicle are disposed of in a manner in which they will not be reused, unless requested for parts recovery return. 17 1919 = 201920 = 202021 = 202122 = 202223 = 2023Etc…Year Campaignis Launched19TA01TT = ToyotaL = LexusVehicle MakeAA = Safety Recall RemedyB = Safety Recall InterimC = Special Service CampaignD = Limited Service CampaignE = Customer Support ProgramF = Emissions Recall(May use other characters in unique cases)Field Action Category and Phase0101 = 1st Field Action of the year02 = 2nd Field Action of the year03 = 3rd Field Action of the year(The sequence is unique for each Field Action category)(May use other characters in unique cases)Field Action Sequence Examples: 19TA01 = Launched in 2019, Toyota, Safety Recall Remedy Phase, 1st Safety Recall Launched in 2019 20TC02 = Launched in 2020, Special Service Campaign, 2nd Special Service Campaign Launched in 2020 21TE05 = Launched in 2021, Customer Support Program, 5th Customer Support Program Launched in 2021 Campaign Designation / Phase Decoder
SEOCONTENT-END
This product presentation was made with AAWP plugin.